Welcome to the world of screen refurbishing a practical and eco-friendly approach to extend the longevity of secondhand computer screens. Unlike regular cleaning, refurbishing focuses on deeper restoration that addresses common problems like scratches, stains, and other wear that accumulate over time.
This guide will walk you through the tools and comprehensive steps needed to revive worn-down screens, ensuring they perform like new ones without the need for expensive replacements.
Identifying Common Issues with Secondhand Screens
When you’re looking to refurbish secondhand computer screens, identifying common issues is crucial to ensure effective restoration. Here are some key problems to keep an eye out for:
-
Scratches
Both superficial and deep scratches can interfere with visibility. Superficial ones might be buffed out, while deeper scratches might require specialized treatments.
-
Stains and Smudges
These can range from your simple fingerprints to more persistent stains caused by liquid spillage or exposure to harsh environments. Some stains might require specific cleaning solutions.
-
Stuck Pixels
Stuck pixels are defects where a pixel will remain permanently colored (red, green, or blue) and doesn’t change as it should.
-
Dead Pixels
These are known as small dots on the screen that do not change color. Dead pixels can be a sign that there is an electronic issue inside the computer screen. This issue oftentimes is unfixable and requires replacement screen hardware parts.
-
Discoloration
This is when you notice a yellowing or uneven color distribution which often occurs due to prolonged exposure to sunlight or heat sources. A situation like this is difficult to reverse and usually requires replacing specific parts like LCD panels or polarizer film.
-
Brightness Issues
An example is when you see dim screens or screens that have lights flickering which is an indication that there are problems with the backlight or the screen’s electronic components.
Fixing this issue can vary in difficulty some might be solved by replacements of simpler parts like a blacklight, inverter, or power supply unit all of which contribute to the proper function of the screen’s display and brightness. More complex solutions involve working on the motherboard directly and require an understanding of circuitry and micro-soldering skills.
Evaluating Refurbishment: When to Repair vs. Replace
After identifying common issues such as scratches, dead pixels, and discoloration it's important to assess whether refurbishing is the most cost-effective route. This choice is usually made from understanding the severity of damages and the cost of repairs relative to the price of a new screen.
Consider factors like the age of the computer screen such as whether is it up to date with what most screens can provide in terms of specs and features, and if the repair can guarantee extended usability. If the cost of refurbishment approaches exceeds that of replacement then it's probably best that you just purchase a new computer screen altogether.
Choosing the Right Tools for Refurbishing
Selecting the right tools and supplies is crucial for successfully refurbishing your computer screens. Here are some suggested tools and their uses:
Cleaning Supplies
Refurbishing processes usually start by cleaning using a soft, microfiber cloth to gently remove any dust and debris from the screen to visibly see the damages more clearly.
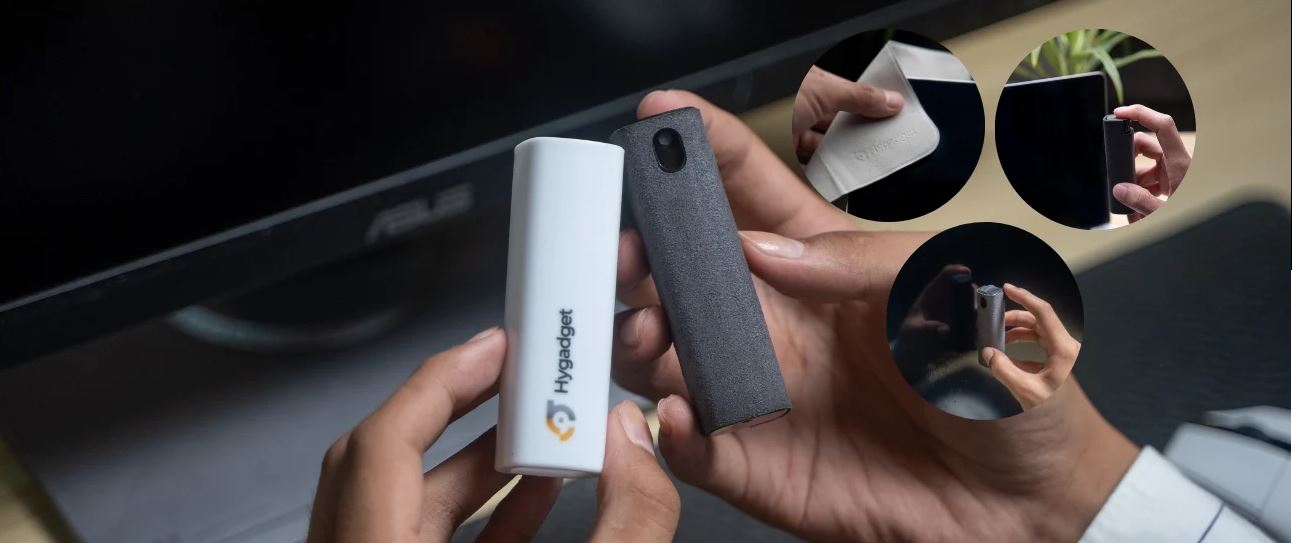
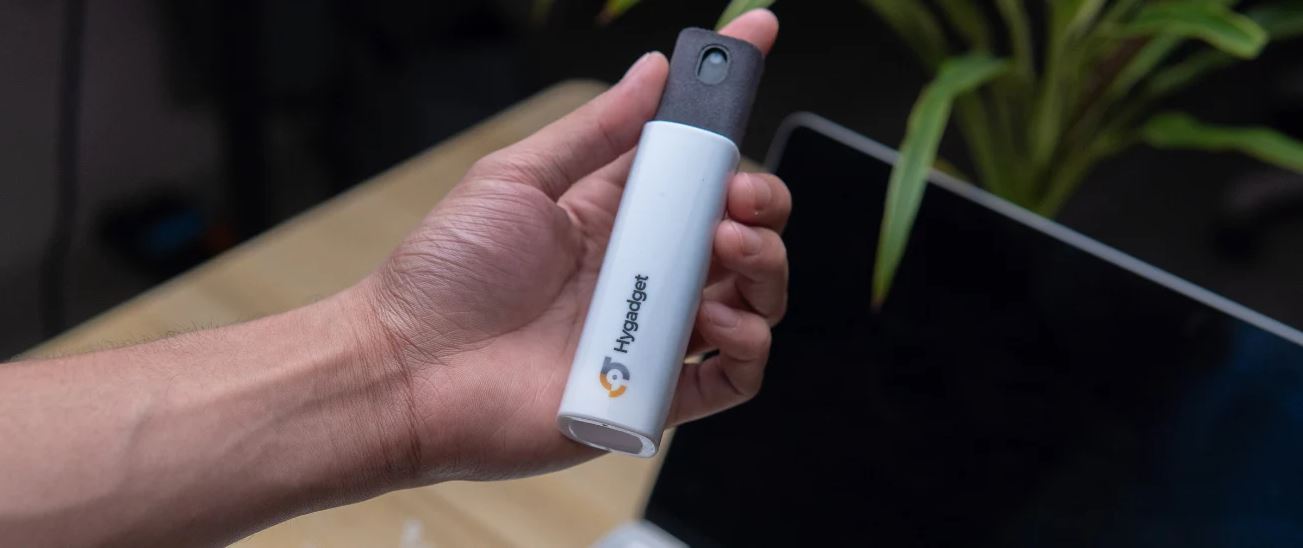
For a thorough cleaning consider using a specialized solution like one provided in the Hyscreen Kit from Hygadget. This kit not only comes with a high-quality soft non-abrasive cloth but also includes a screen-safe cleaning solution that effectively removes stubborn stains and fingerprints without damaging the screen.
Investing in this cleaning kit will ensure your refurbished screens are immaculate and free from blemishes. You may also consider seasonal changes when making your decision on choosing the right screen cleaner.
Scratch Repair Kits
For deeper scratches on computer screens, it's recommended to use specialized scratch repair kits. These kits typically include a variety of screen refurbishing supplies but the two main types are:
-
Polishing Compounds
For glass screens a common choice would be cerium oxide due to its effectiveness in polishing out scratches. For softer, non-glass screens like those in LCD or OLED displays, you want to use a gentler solution like Novus plastic fine scratch remover. This compound is specifically formulated to ensure scratches are repaired without damaging their delicate screen surfaces.
-
Applications Tools
These come in the form of soft pads, microfiber cloths, and fine brushes designed for precise application. The main purpose of these tools is to ensure the compounds are applied evenly and to safely buff the screen surface in order to reduce the appearance of scratches.
Suction Cups or Dissembly tools
When refurbishing involves internal repairs or screen replacements there are tools like suction cups or disassembly kits that may include spudges, screwdrivers, tweezers, or opening picks. These tools and kits are essential to help safely open up the device without damage to the screen or the casing.
LED backlight Tester
An LED backlight tester is a tool used for diagnosing and repairing blacklight issues. It will help verify the functionality of the screen’s blacklight which is essential for ensuring that brightness and display quality are up to the standard post-refurbishment
Step-by-Step Guide to Refurbishing
-
Assessment
Firstly examine the screen closely in a well-lit area to identify all the visible issues like scratches, stains, or discoloration. Consider using tools like a magnifying glass to identify defects or scratches more closely.
-
Cleaning
Wipe the screen using a microfiber cloth to remove dust and loose particles. For stubborn stains or dirt use a screen-safe cleaning solution.
-
Scratch Treatment
Apply a scratch repair compound appropriate for your screen type. For glass screens, use cerium oxide, and for non-glass screens like LCD or OLED, use Novus plastic fine scratch remover. Then use the soft pads or fine brushes to apply the compound in a gentle circular motion but be careful to:
- Use a small amount as an excess compound can be difficult to remove and may cloud-screen.
- Apply gentle pressure as excessive force can worsen the scratches or damage the screen.
- Target only affected areas where scratches are appearing.
- Thoroughly buff the area with a microfiber cloth to remove leftover compound.
-
Check for Pixel Issues
Utilize pixel-fixing software like JScreenFix that can help revitalize stuck pixels by rapidly cycling them through various colors. If this method doesn’t fix the issue then it might indicate a deeper hardware problem. In this case, you might need to consult with a professional repair service.
-
Adjust Color and Brightness
Advanced tools like a colorimeter can help with measuring colors displayed by computer screens and adjusting them to match standard settings accurately. You can use software like DisplayCAL alongside these tools to achieve professional-level color accuracy. If discrepancies persist despite doing the calibration then it could suggest more of a serious issue and a professional might need to be contacted to resolve them.
-
Final Testing
Connect the computer screen to your PC and start reassessing the screen to ensure all issues are addressed. Play around with different applications on your computer and display settings to see if any issues occur with pixels, color, and brightness.